
Your First agileCCPM Project
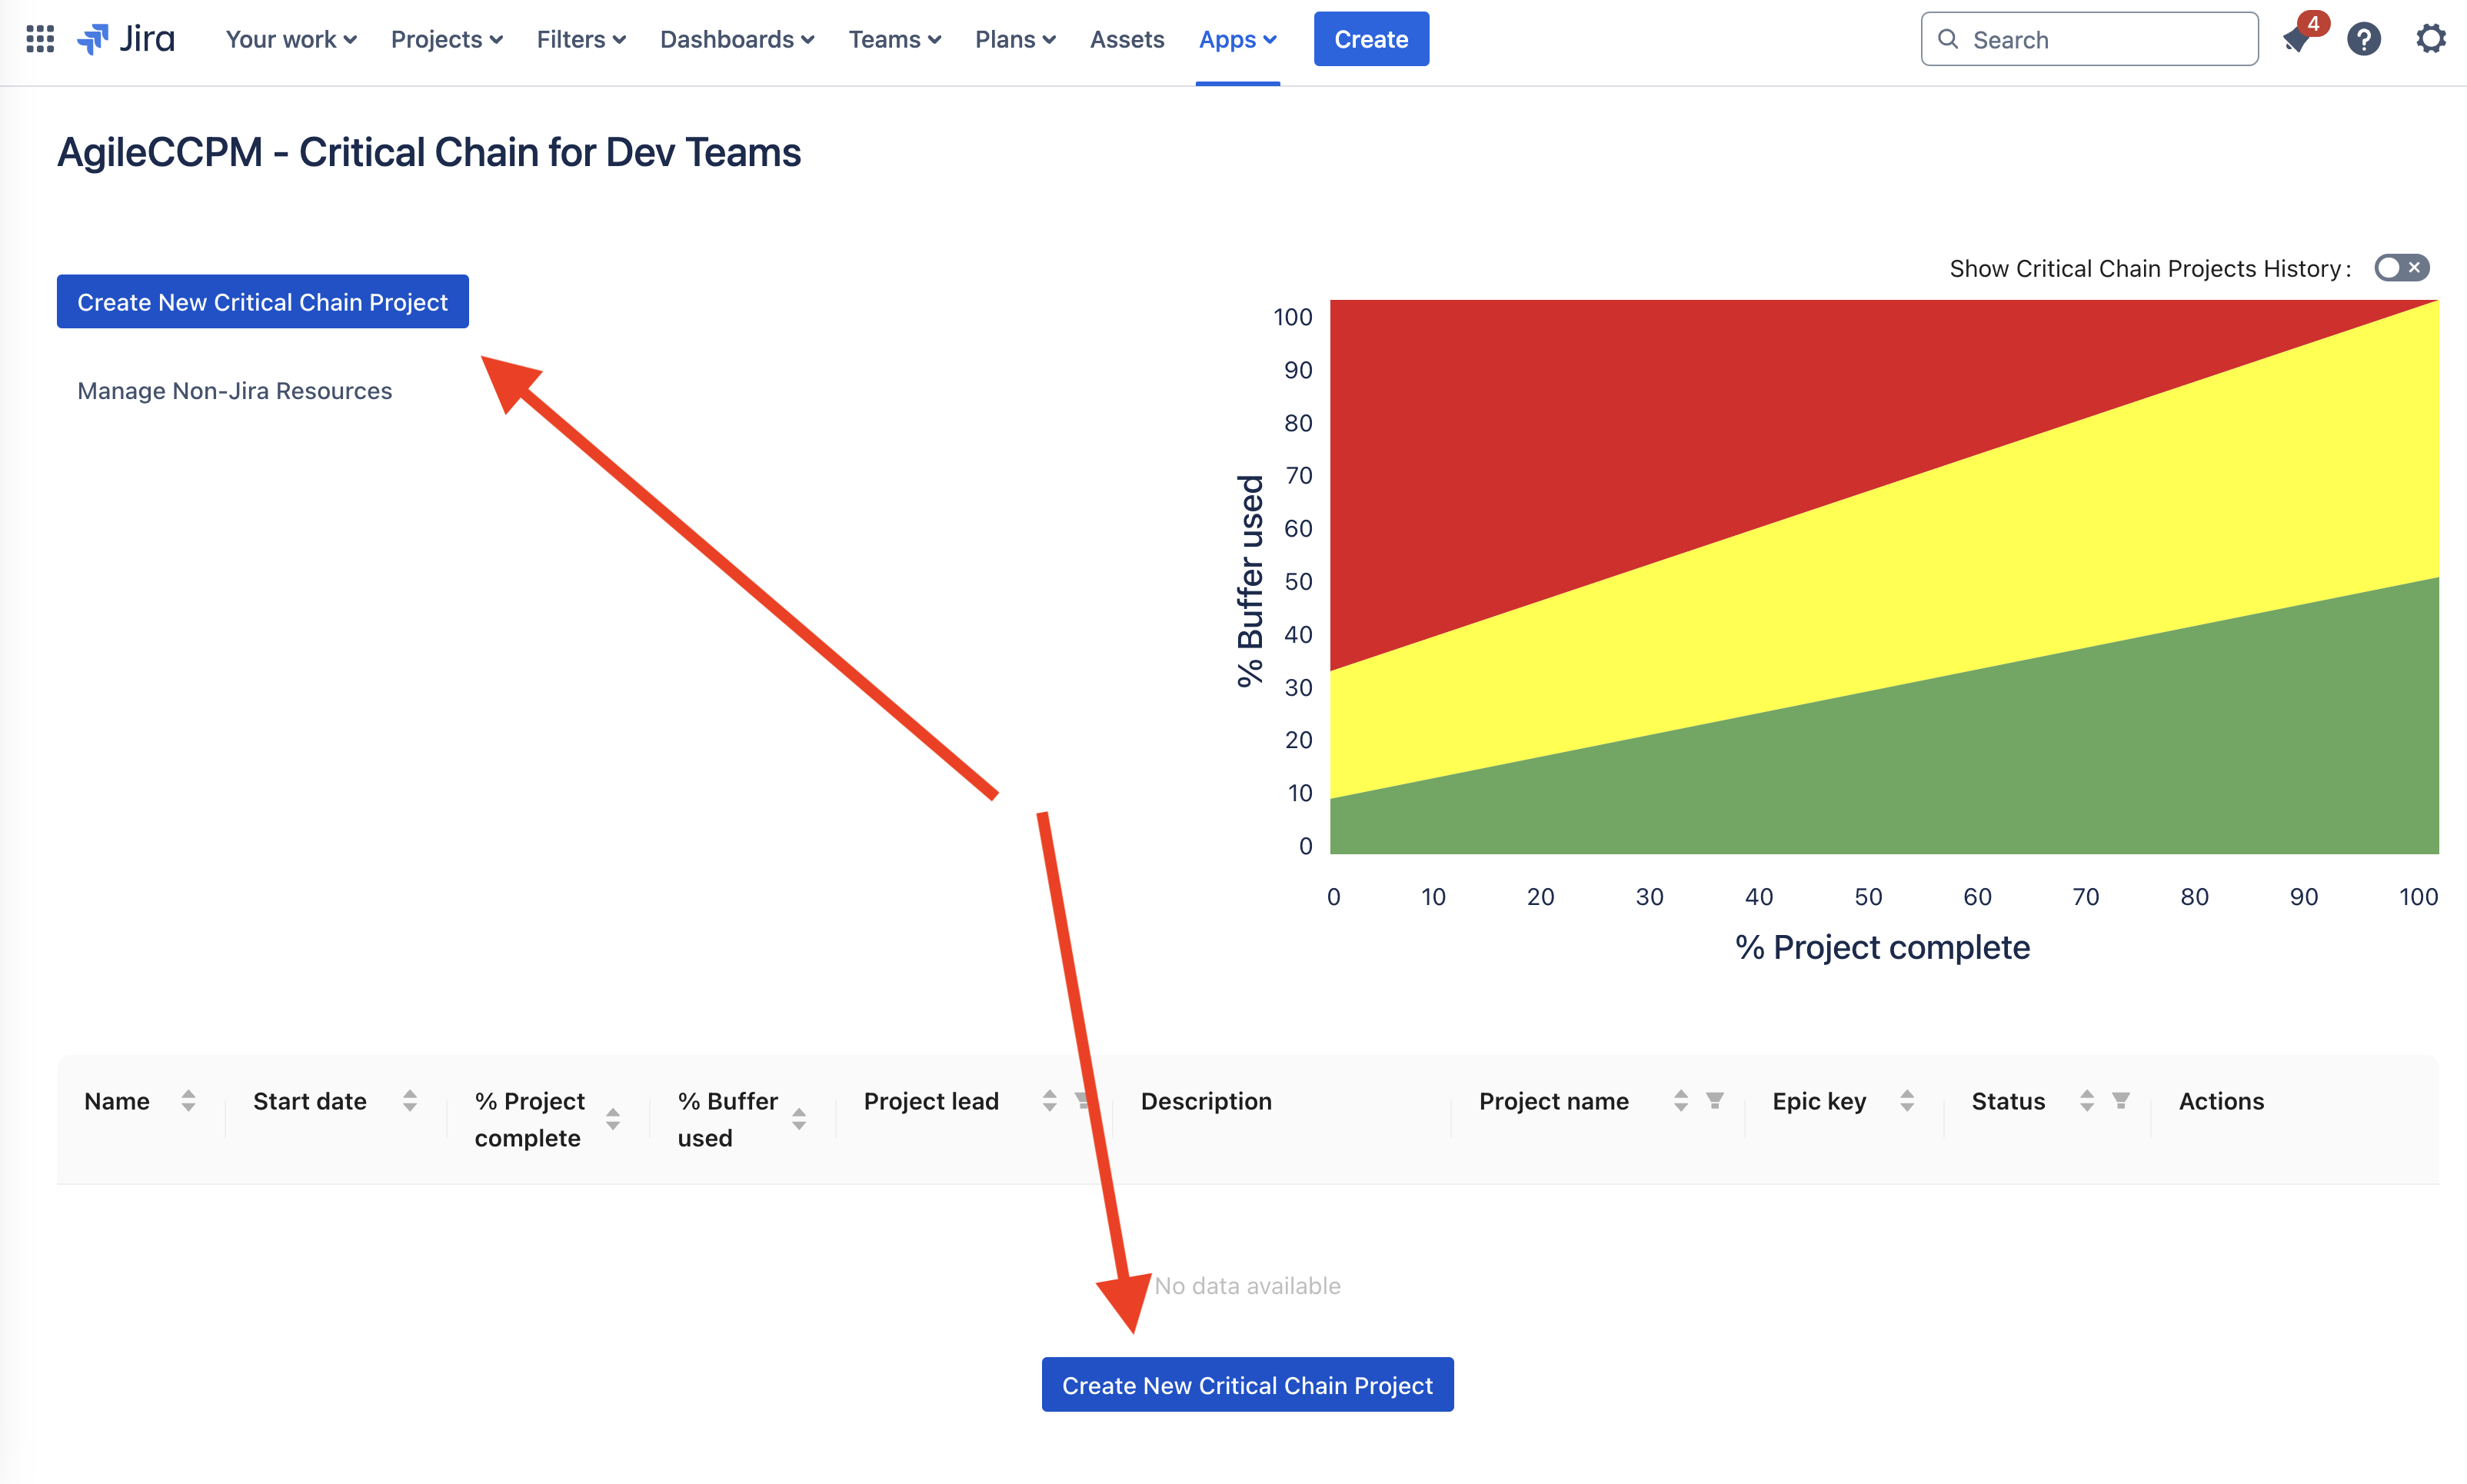
1. Click on the Create New Critical Chain Project button
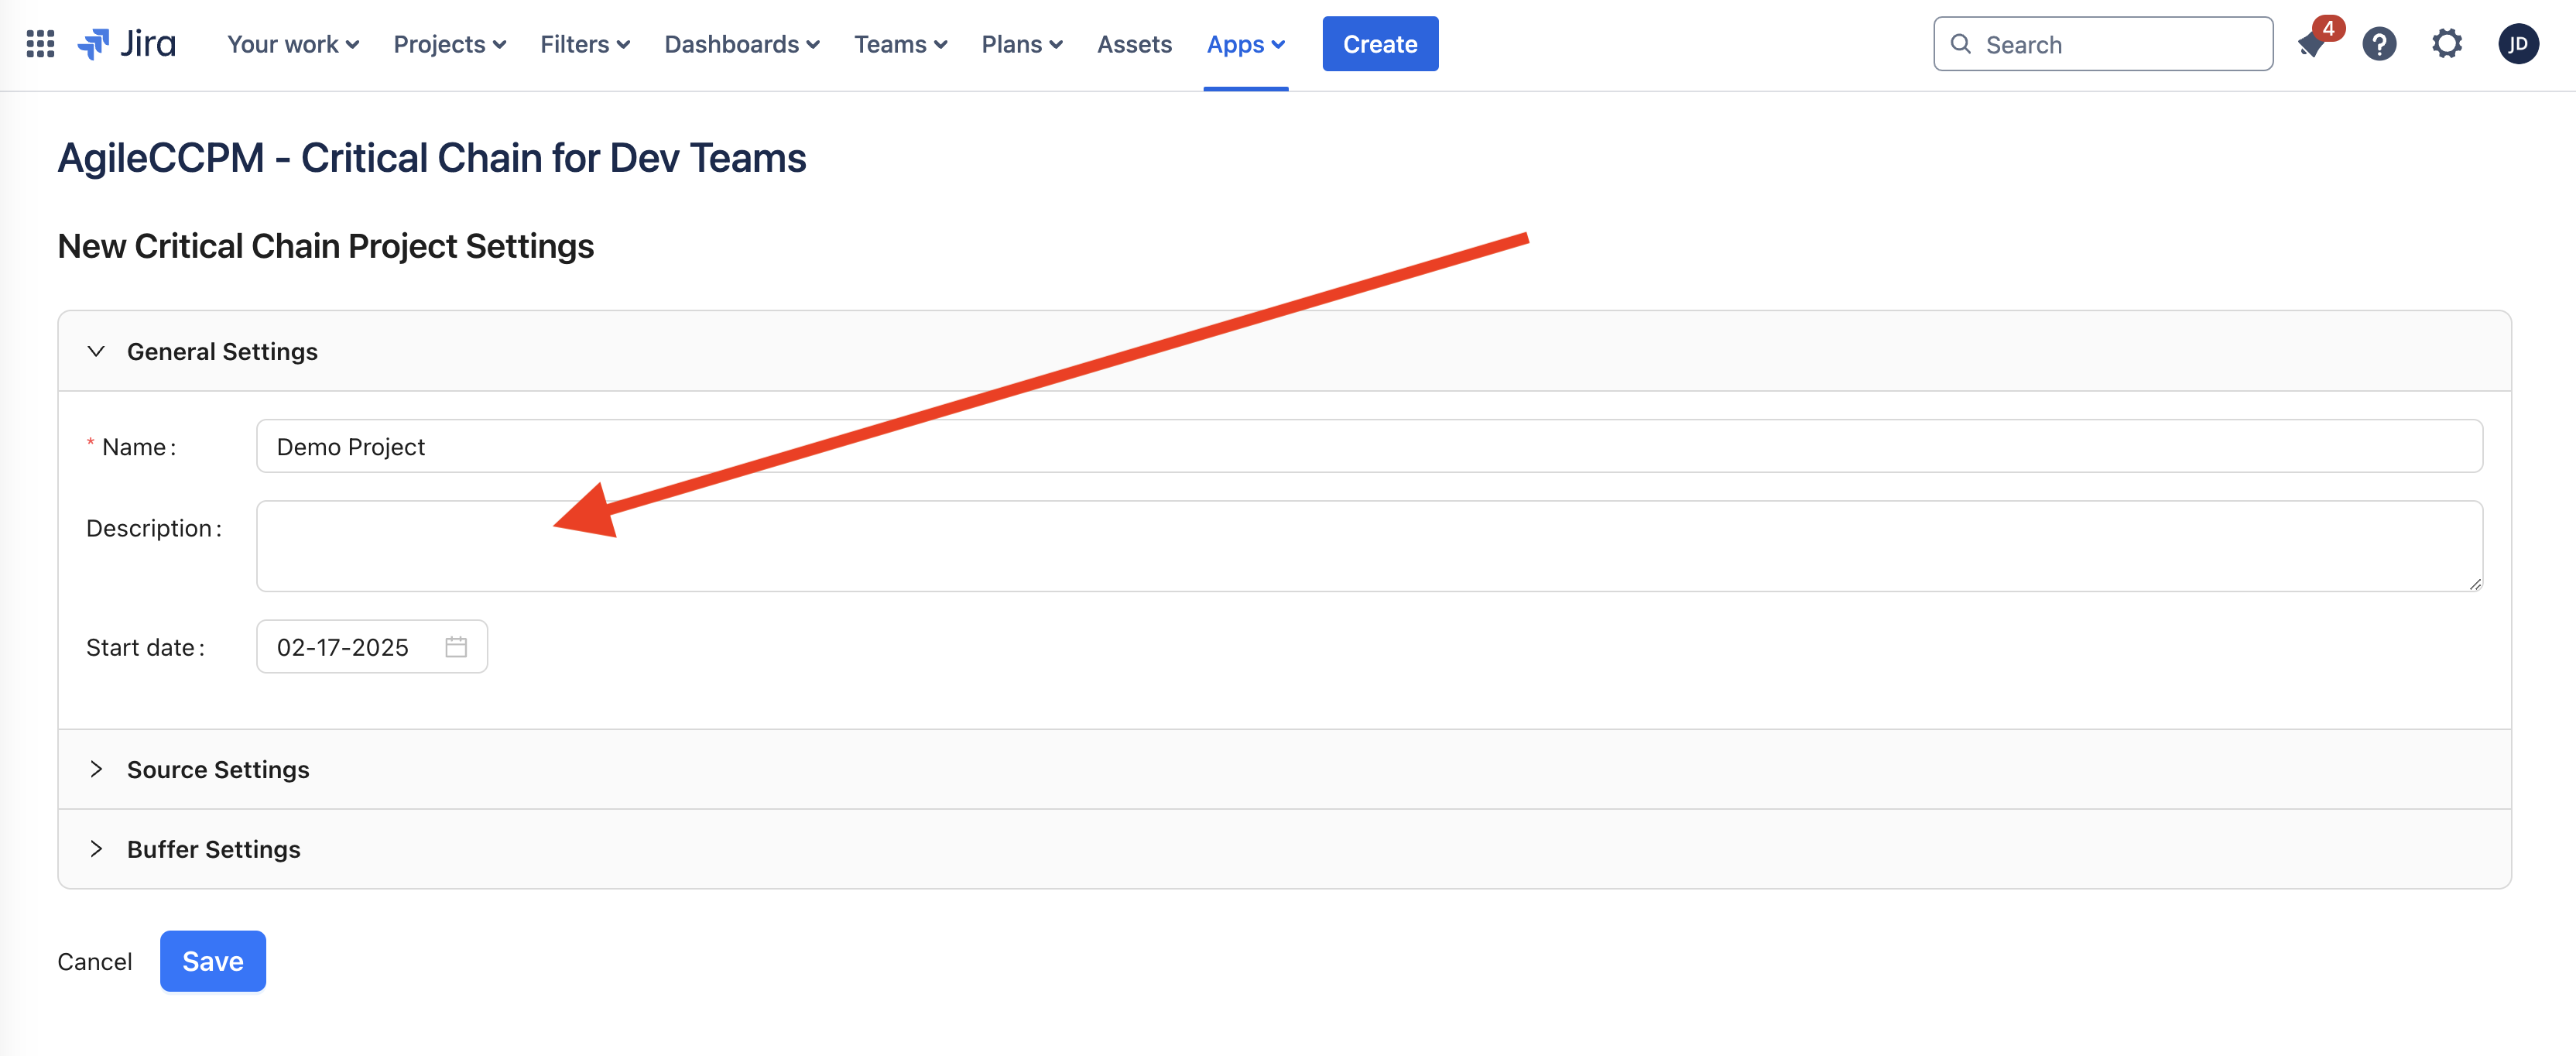
2. General Settings
Fill in general info like Name and Start Date.
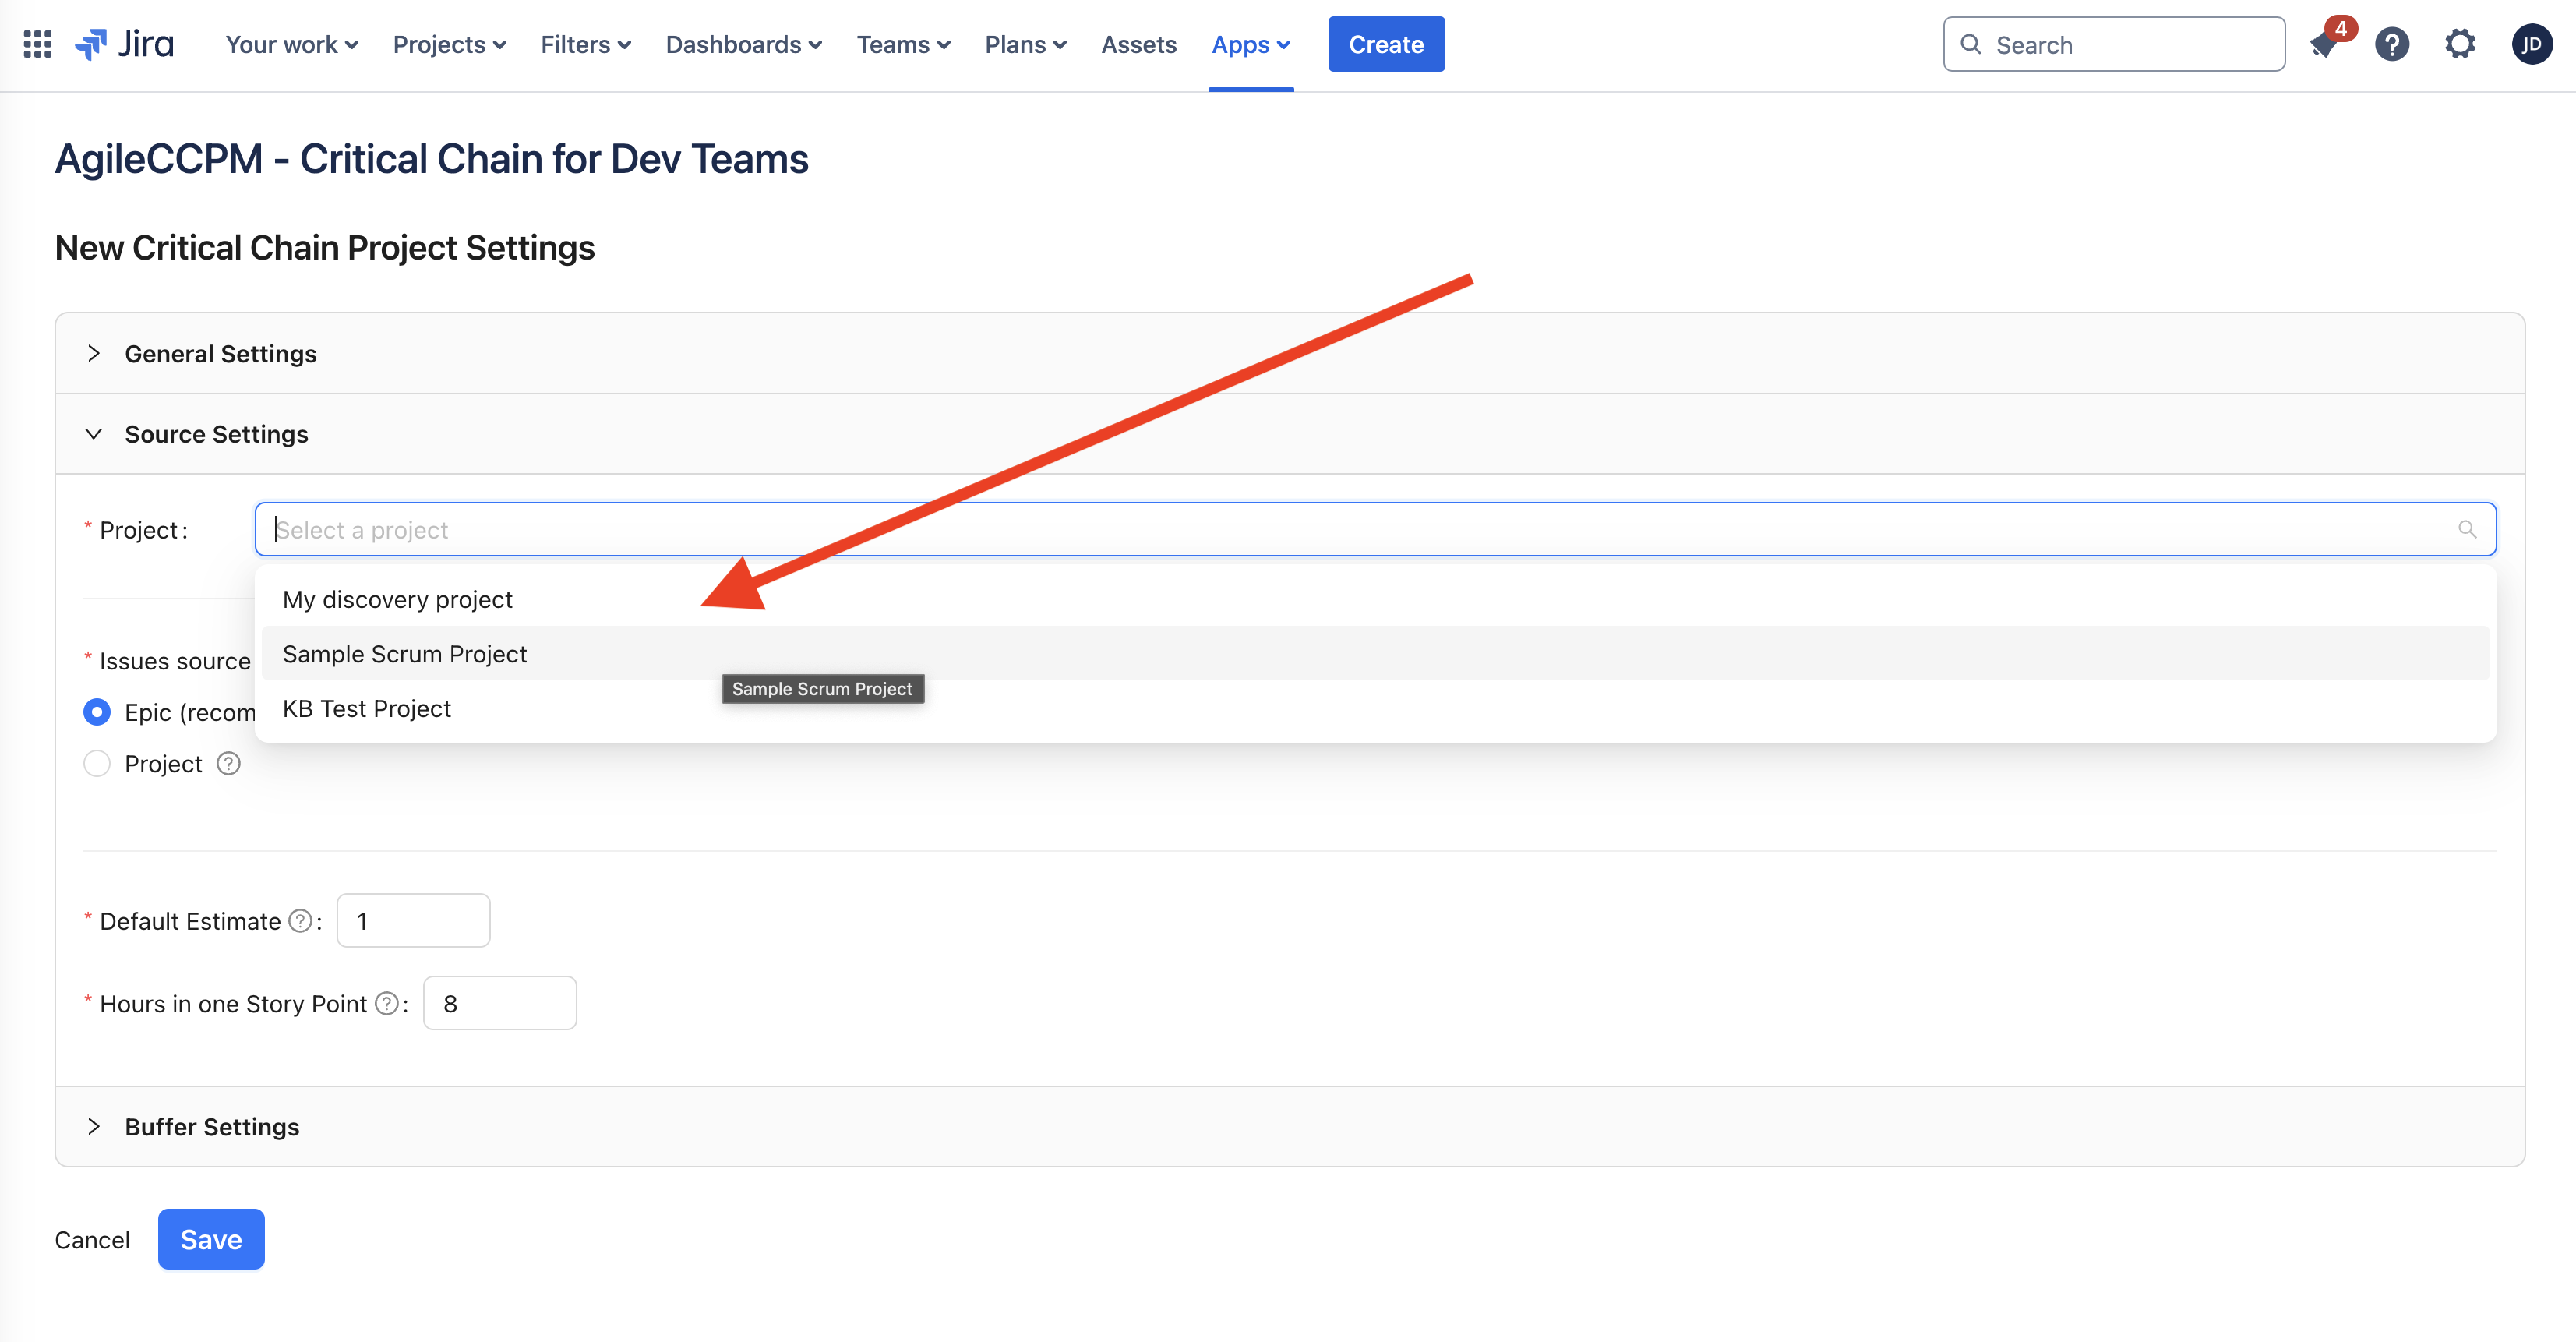
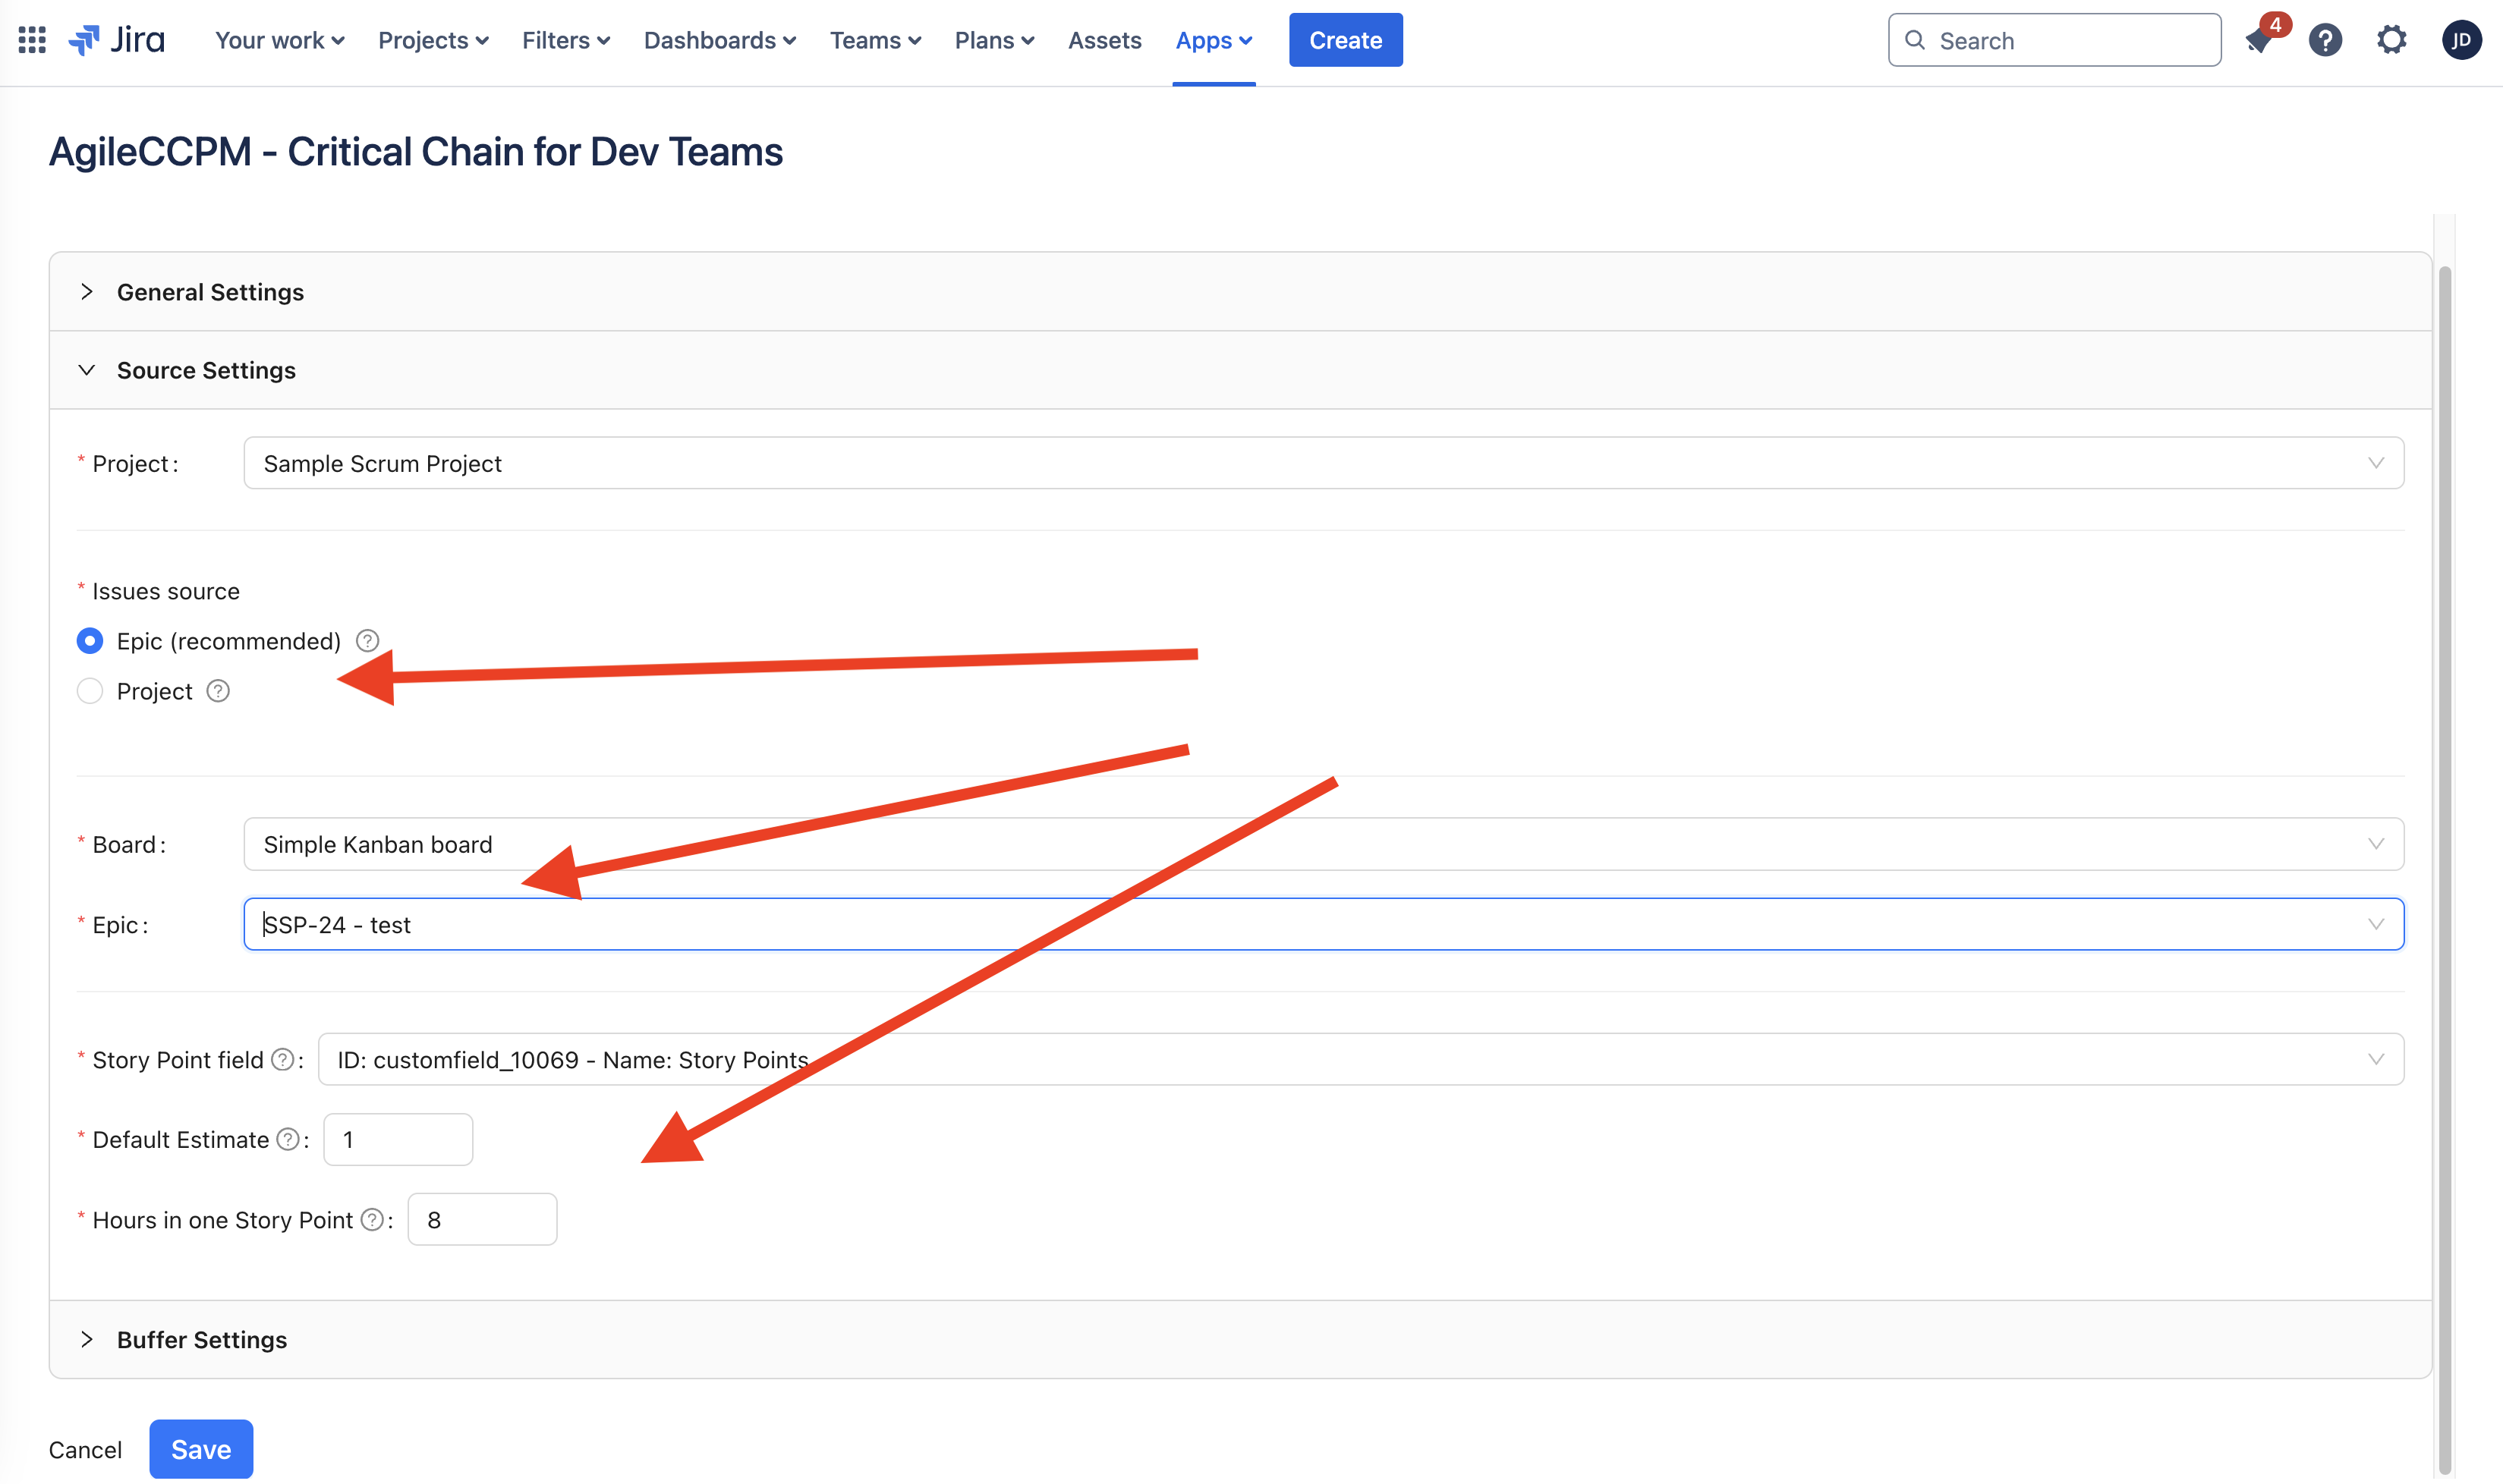
3. Select Issues Source
First, you need to select the Jira project you want us to fetch issues from.
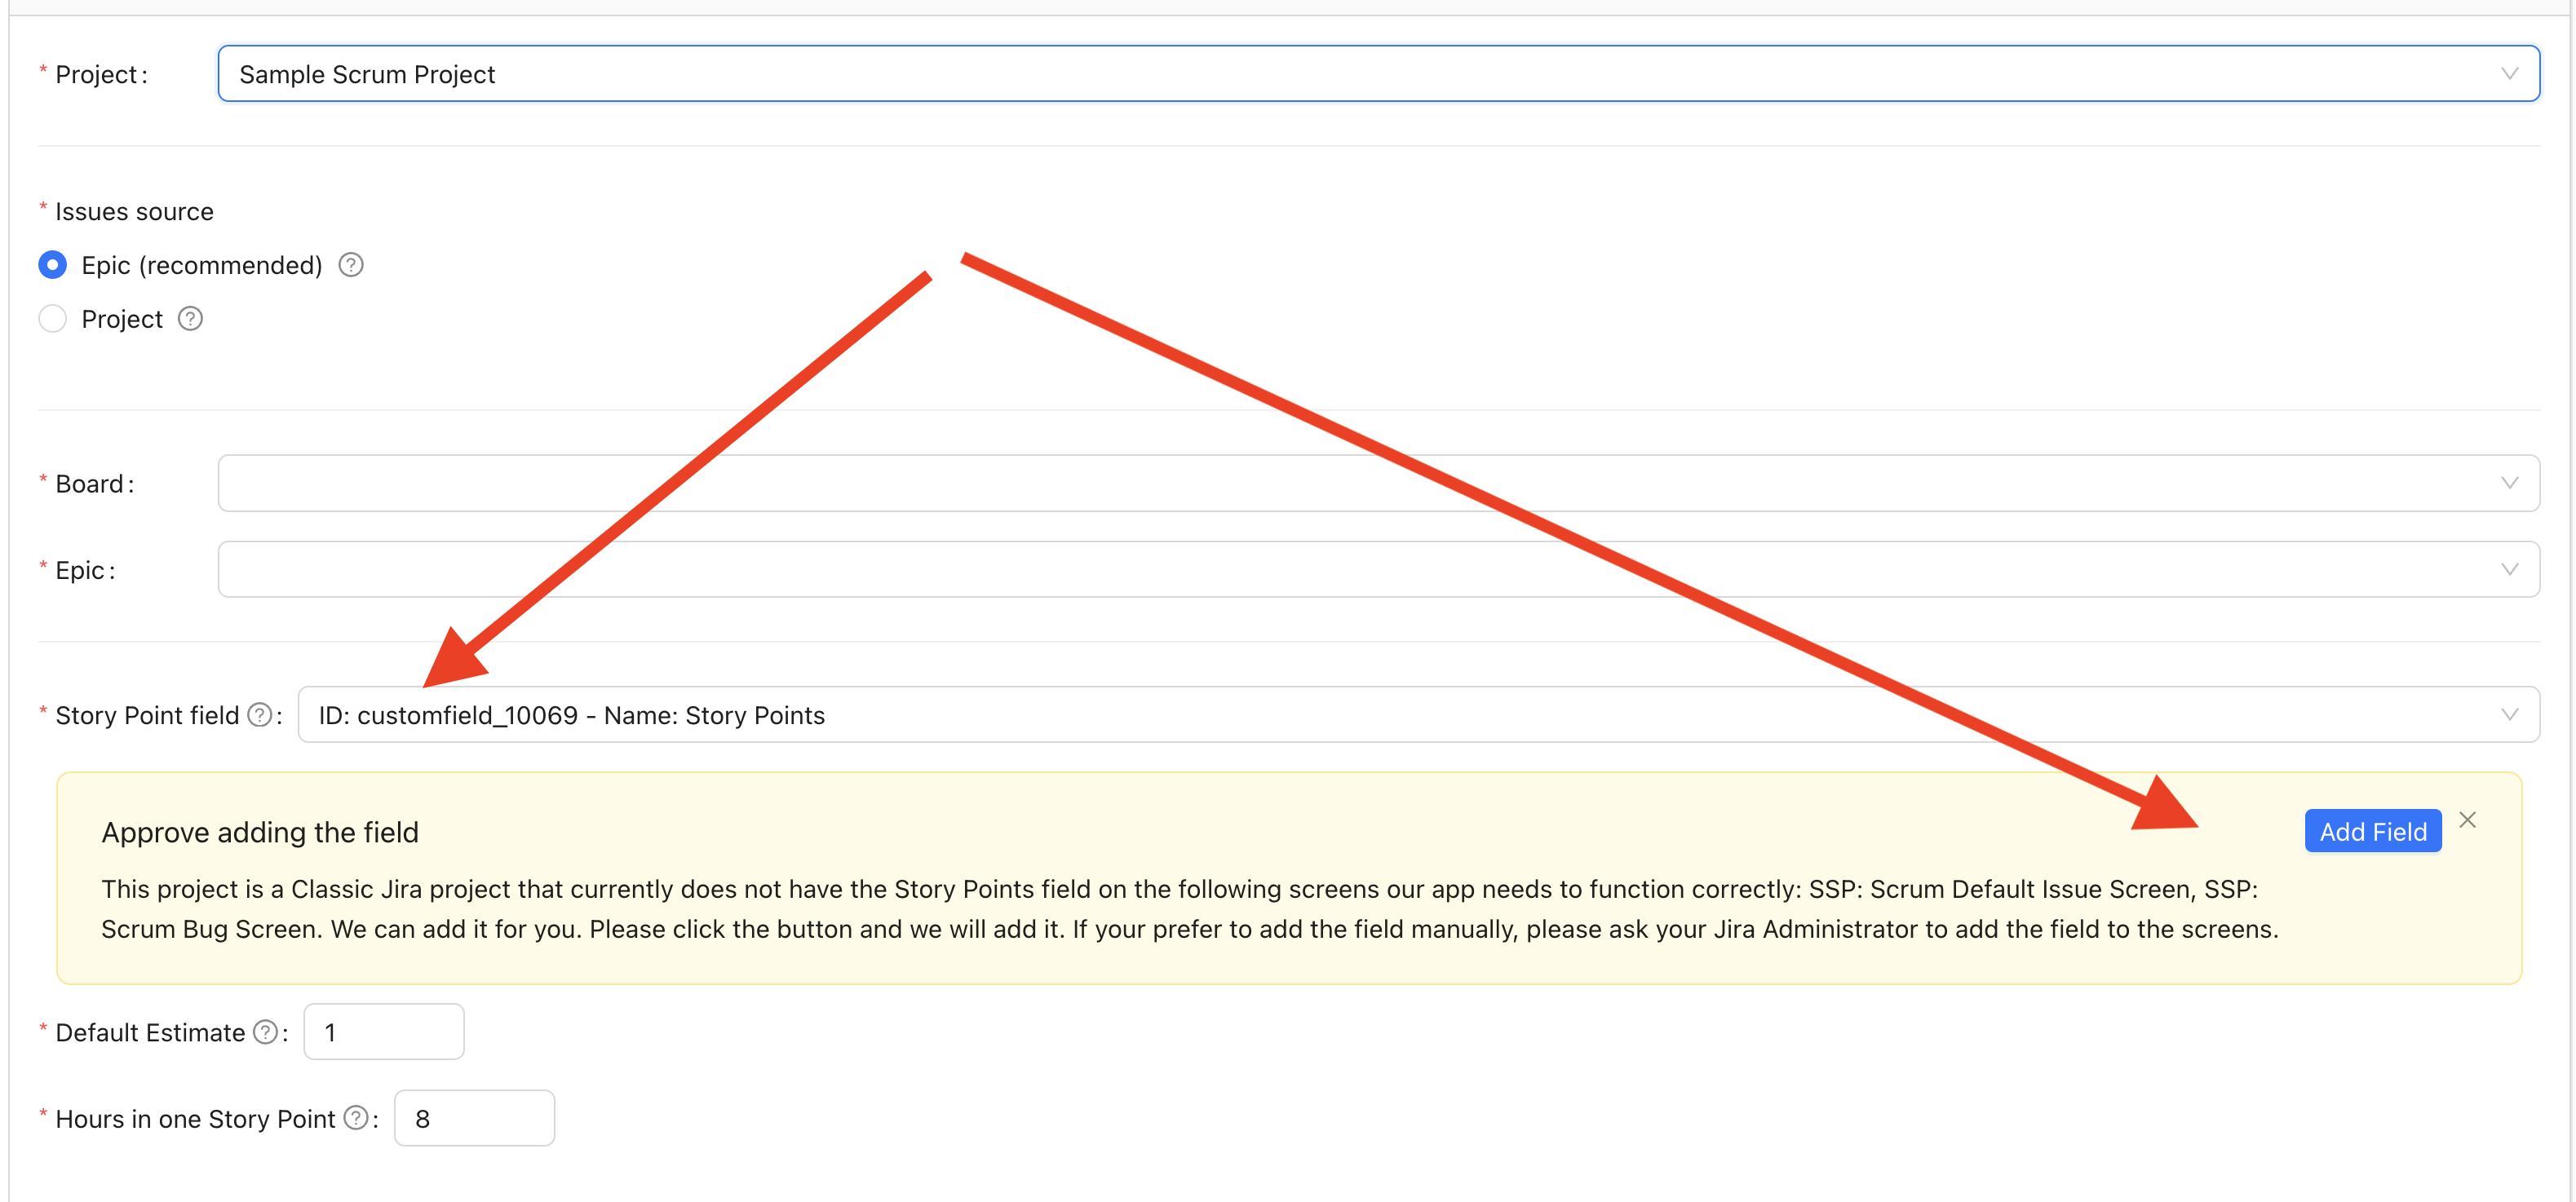
4. Verification of the Presence of the Needed Fields on Screens
Jira projects come in 2 major styles - classic (also named company-based) and next-gen (also named team-based).
Depending on the style of your project, we need to pick the correct Story Points field and verify that the corresponding field is present on the required screens agileCCPM needs to work correctly.
If we identify that the needed fields are not added to the required screen (it typically happens for classic projects only), we will show a warning and a button to automatically add the needed fields.
The fields MUST be added for our application to work correctly.
5. Further Specify Source
While using the whole Jira Project as the source of issues is an option, in most cases, you would benefit more from narrowing down the scope to a specific Jira Board and Epic.
It is typically better not to have more than 100 issues/tasks in your projects, since it means that some of your issues are less than 1% of the overall project duration and you are likely going to micro-manage it. If your project is very big, you might benefit more by splitting it into several related Epics or even Projects.
If your Story Points estimate is different from the most common 1 day (8 hours) per Story Point, feel free to adjust it.
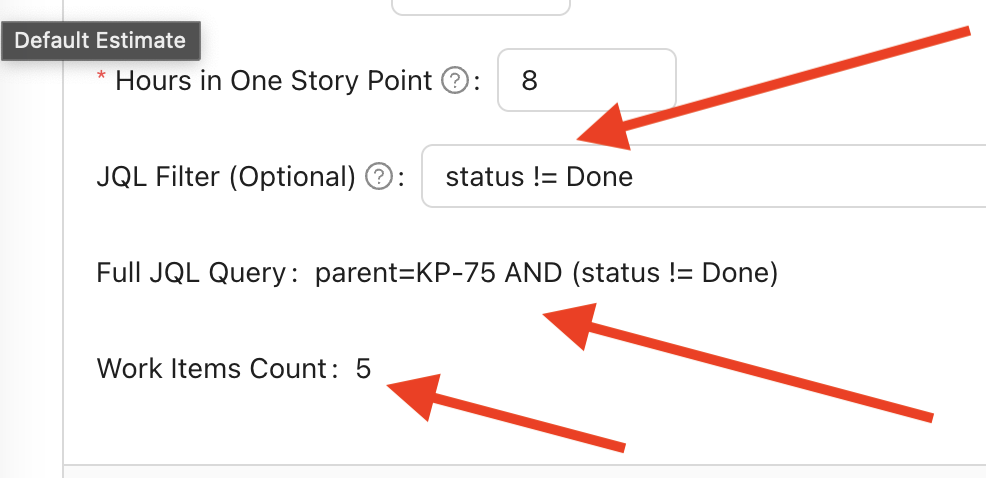
6. Optionally Filter Work Items
There are situations where you might want to filter out some work items.
For example you could have been working on a project for a long time
before you discovered agileCCPM and now you want to exclude already finished
tasks.
You might have some specific workflow or logic where you do not want to have
tasks to be part of your project.
In this case you can use the optional JQL Filter field to enter the part
that will include or exclue the issues from the Project or Epic.
You can use All work or Issues tabs in Jira with JQL search to test the
query you want to get and than put this part into the field.
WHen you do this, we will show the full JQL query we use to select work items for
your Critical Chain project.
We are also showing the count of items so that you can see your JQL query is working correctly.
7. Adjust Buffer Sizes
Critical Chain Project Management methodology suggests that you choose 50% as your initial buffer sizes.
This might seem big to those who did not work with CCPM before, but the correct way to schedule a Critical Chain project is to reduce individual task estimates (typically around 50% as well) and strategically add some of this time where it actually matters.
Thus, we suggest that you start with 50%, and then based on the results you get with your initial projects, your company maturity, level of uncertainty, scope changes, etc., you might start adjusting your buffer sizes.
If most of your projects end up in the red zone or consistently consume all Project Buffer safety, you probably need bigger buffers. If you are consistently in the green zone, you should decrease your buffers.
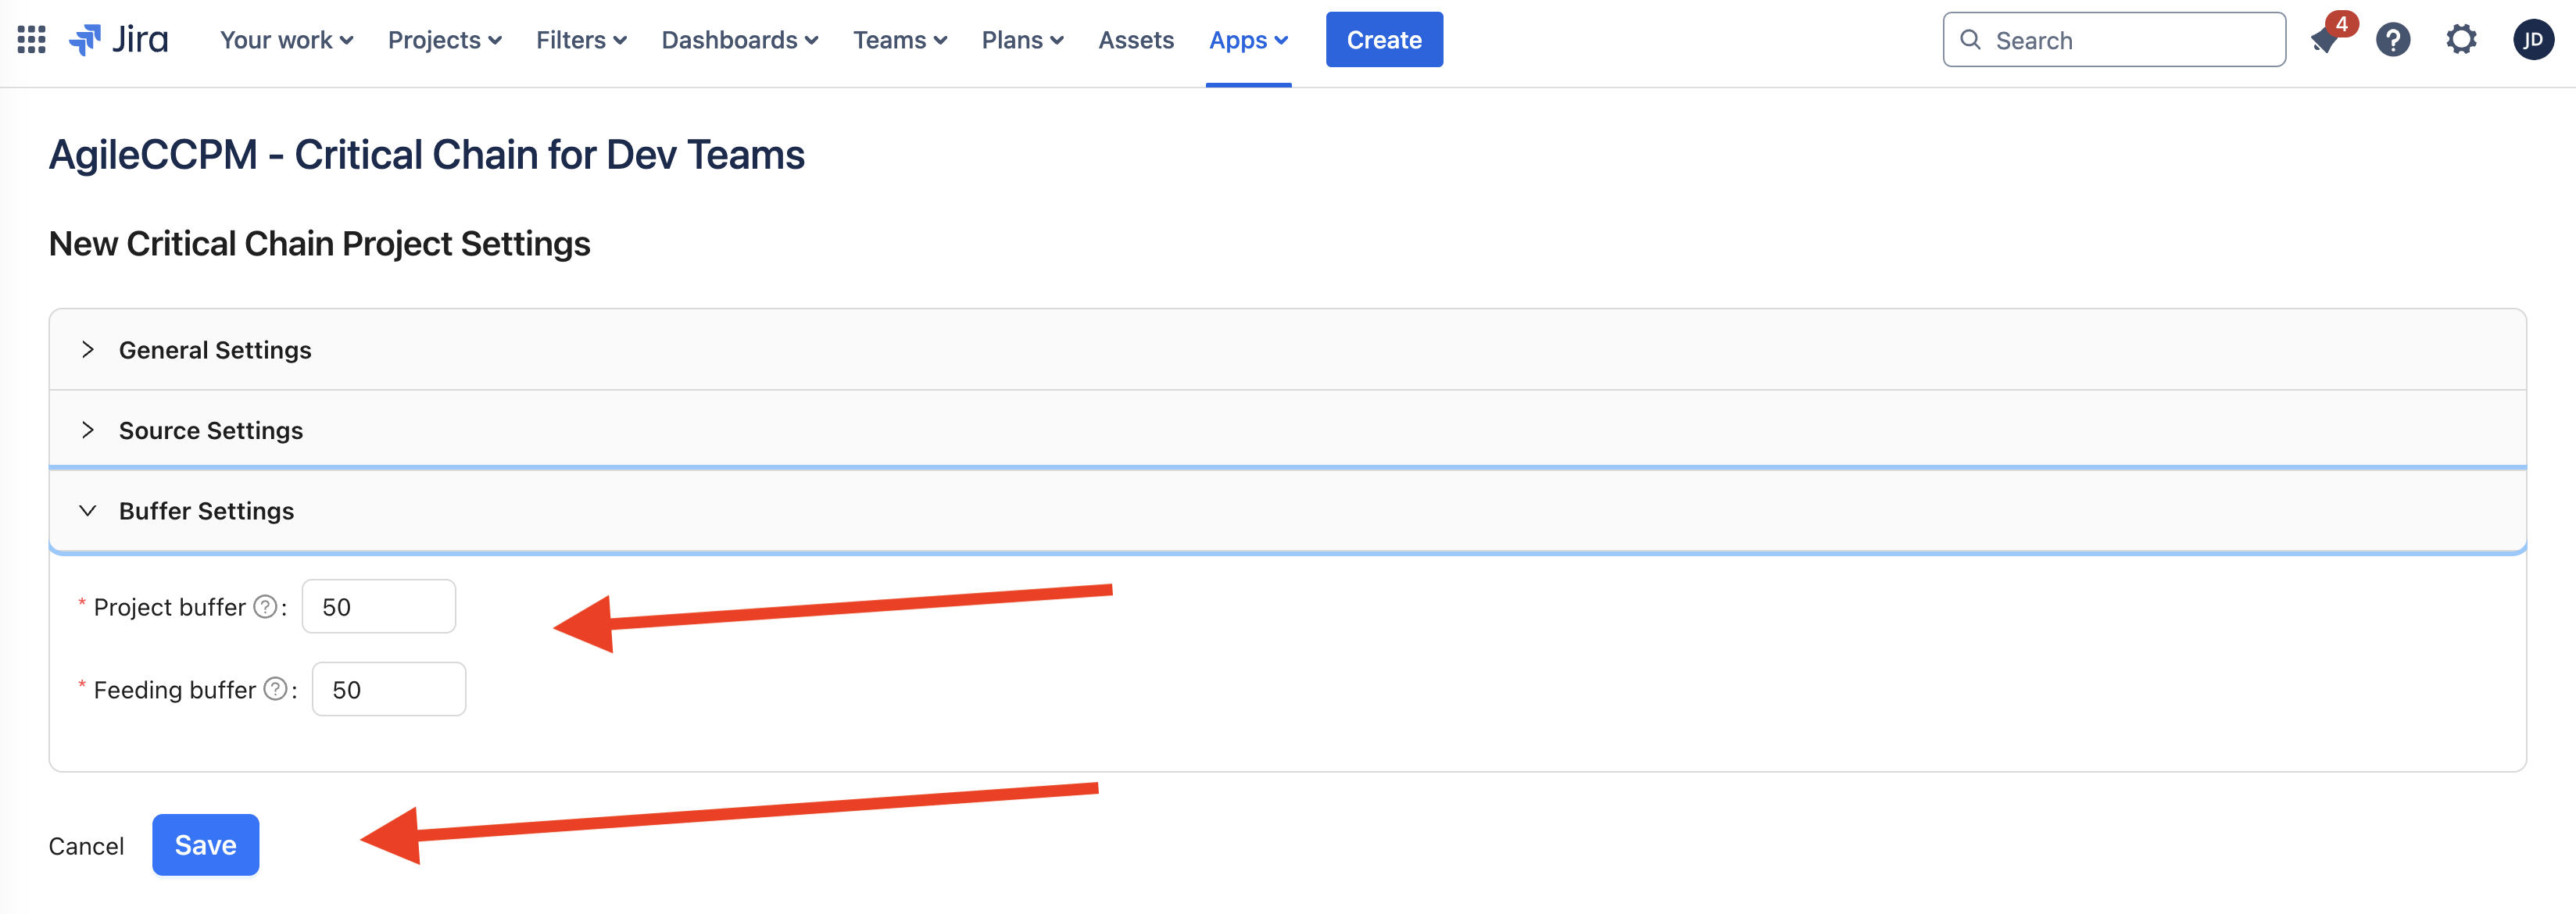
8. Save and Get to Your Automatically Planned Schedule
After you click the Save button, we take you to the Schedule view with your project planned.
If you had issues in your Project or Epic, we will automatically fetch them.
We use is blocked by and block Jira issue Link Types to determine and store issue sequences. If you have them already defined, we will pull that information and schedule your Critical Chain accordingly.
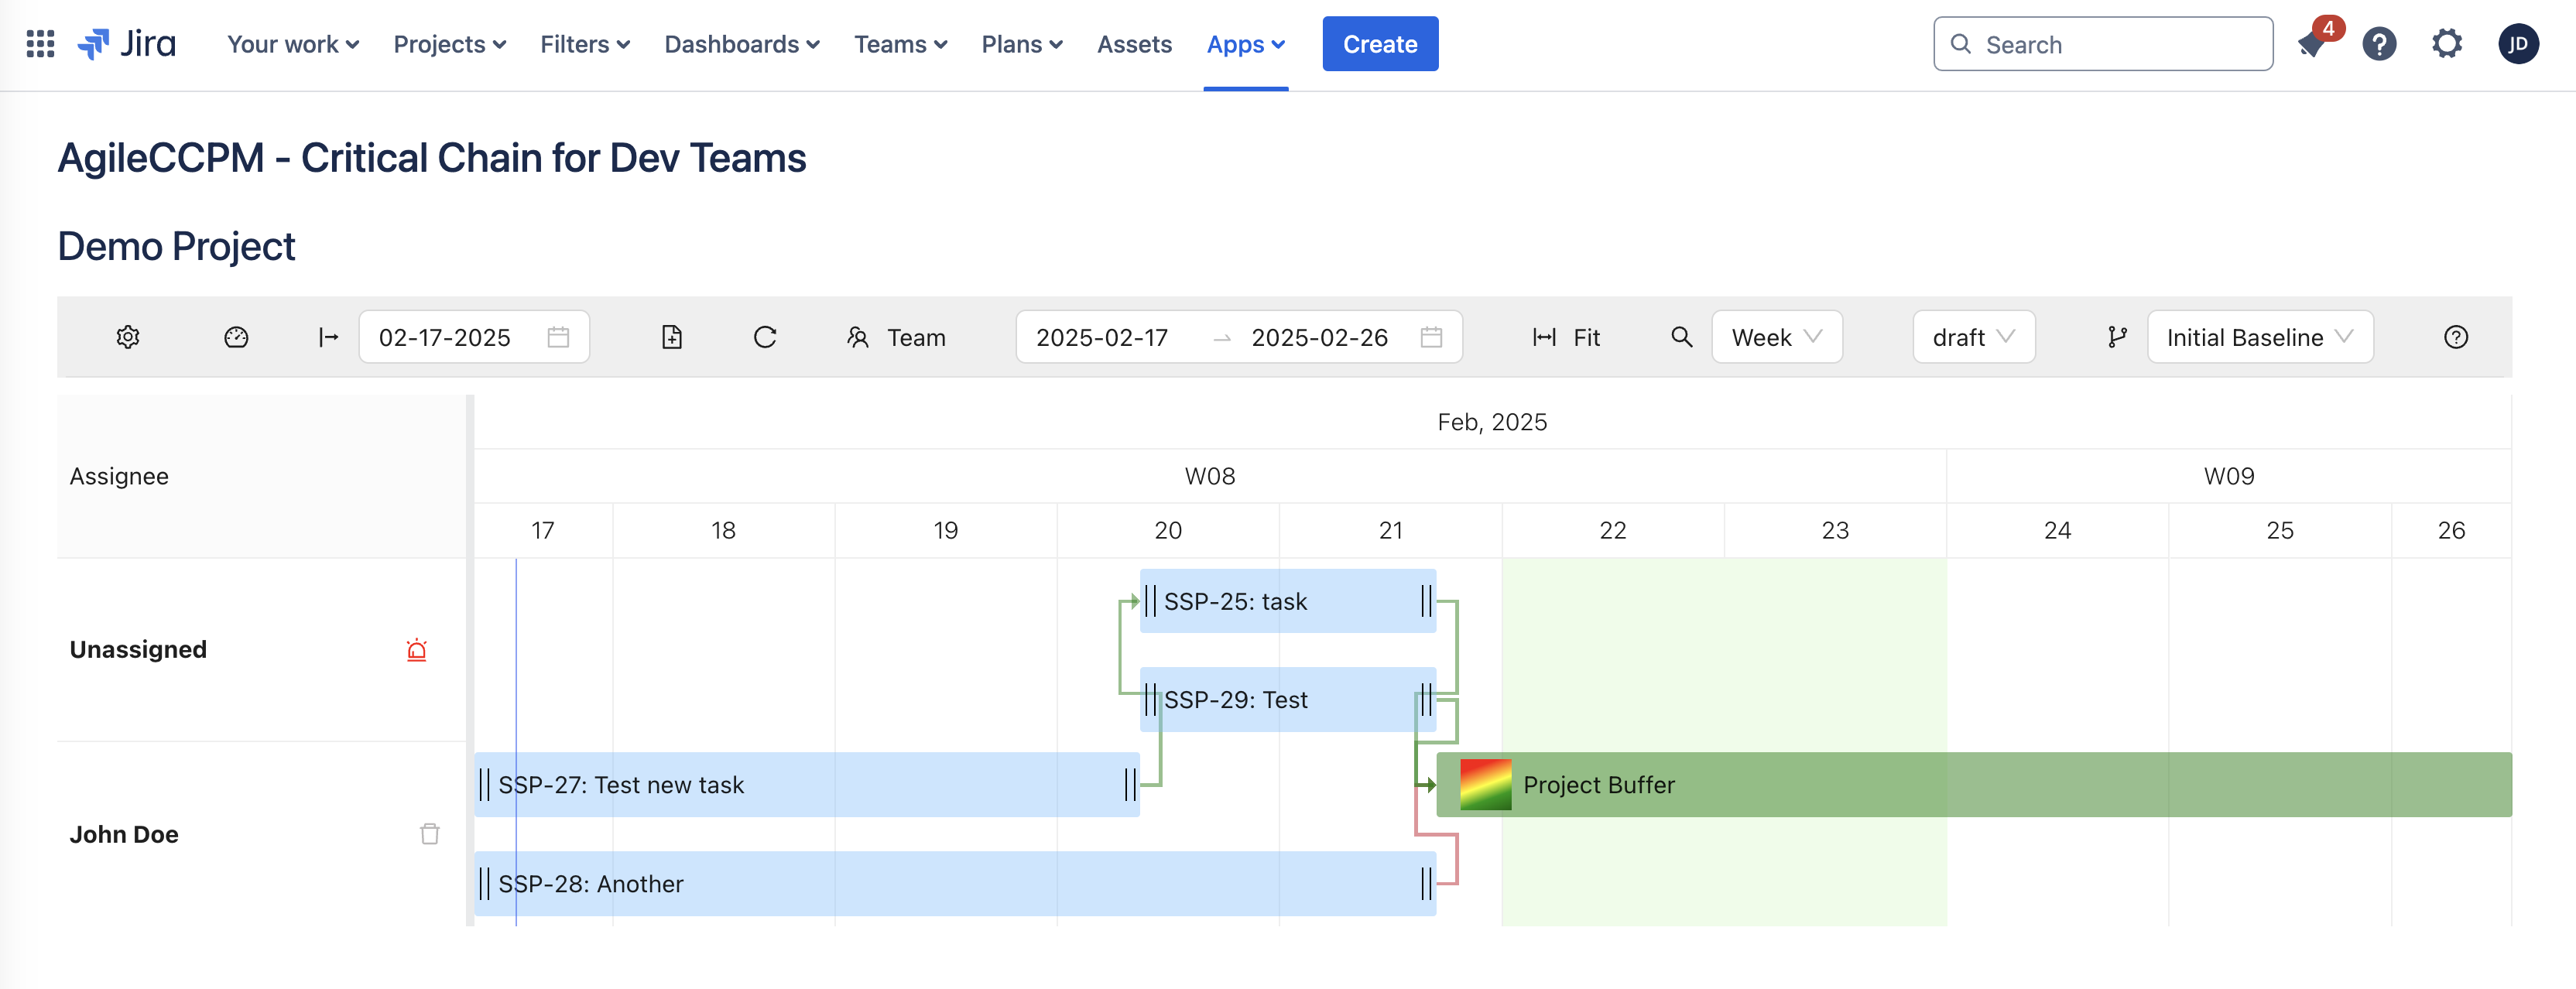
Learn the controls of our Schedule view of your Agile Critical Chain Project