
Scheduling in Critical Chain
This guide will walk you through the steps to schedule a Critical Chain project, enabling you to create a realistic, resource-optimized project plan by integrating task dependencies, resource constraints, and buffers.
1. Identify Project Activities by Working Backward from the Goal
- Define the project goal: Begin with the desired outcome and work backward to identify all necessary tasks, resources, and dependencies.
- Use necessary condition logic: Ask, “What must be done to achieve this goal?” for each step, systematically mapping the activities and their relationships.
- Create a project network diagram: Design a visual representation of tasks and dependencies, ensuring every task has a successor to avoid dangling activities.
Example:
Redesigning a website might involve starting with the launch of the new site and working backward to identify key steps, such as final testing, implementing new designs, coding new functionality, writing updated content, creating wireframes, and gathering user feedback. For instance, implementing new designs depends on finalized wireframes, which in turn require input from stakeholders and user research.
Tip: If you’re using Jira, our agileCCPM for Jira app can import your existing Project or Epic tasks and create a schedule based on them. You can further refine the schedule by adding additional tasks, defining their dependencies, and assigning resources.
2. Estimate Task Durations with 50% Probability of Completion
- Set optimistic estimates: Use durations that represent the expected time to complete each task under normal conditions, without adding padding for delays (50% confidence).
Read more here to understand why this approach works and how it benefits project planning.
Instead of padding individual tasks, buffers will be added later where they are most effective.
This method minimizes common pitfalls, such as procrastination (student syndrome) and over-perfectionism (Parkinson’s Law).
Note: Our agileCCPM for Jira app automatically pulls Story Point estimates from your existing Epics and Projects. Review these estimates to ensure they reflect a 50% probability of completion, rather than the 80–90% often used in Agile methodologies like Scrum or Kanban or traditional methods like Critical Path.
3. Assign Resources and Resolve Resource Conflicts
Identify Resource Needs
Determine which resources (e.g., personnel, contractors, partners) are required for each task.
Resolve Resource Conflicts
Identify resource dependencies and reduce multitasking so critical resources are not overcommitted.
Remember, if resources were infinite, Critical Path and Critical Chain would align. In reality, prioritization is necessary to determine which tasks a resource should focus on first.
Note: Unlike Gantt charts, which make it difficult to identify resource multitasking, agileCCPM provides a modified Timeline View. This intuitive interface highlights over-allocated resources, making it easier to resolve conflicts at a glance.
4. Find the Critical Chain
- Define the critical chain: Identify the longest sequence of tasks that incorporates both task dependencies and resource constraints.
- Schedule tasks as late as possible (ALAP): This approach minimizes work in progress (WIP), reduces multitasking, and defers costs until necessary.
Note: Our app automatically calculates the Critical Chain for you in Jira and schedules each task ALAP, saving you time and effort.
5. Add Buffers and Finalize the Schedule
Insert Buffers Strategically:
-
Project Buffer:
Added at the end of the critical chain to protect the project deadline. The recommended default size is 50%.While a 50% buffer may seem large to newcomers, remember that task estimates were reduced by ~50% initially. Despite the buffer, the total project duration is usually ~25% shorter than traditional approaches using Critical Path and Gantt Charts.
-
Feeding Buffers:
Placed where non-critical task sequences feed into the critical chain. The default size is also 50% of the feeding chain duration. -
Resource Buffers:
Notifications sent to critical resources ahead of task start times, ensuring their availability. -
Lock Buffer Sizes:
Once the project begins, buffer sizes remain fixed to act as an early-warning system for project risks.
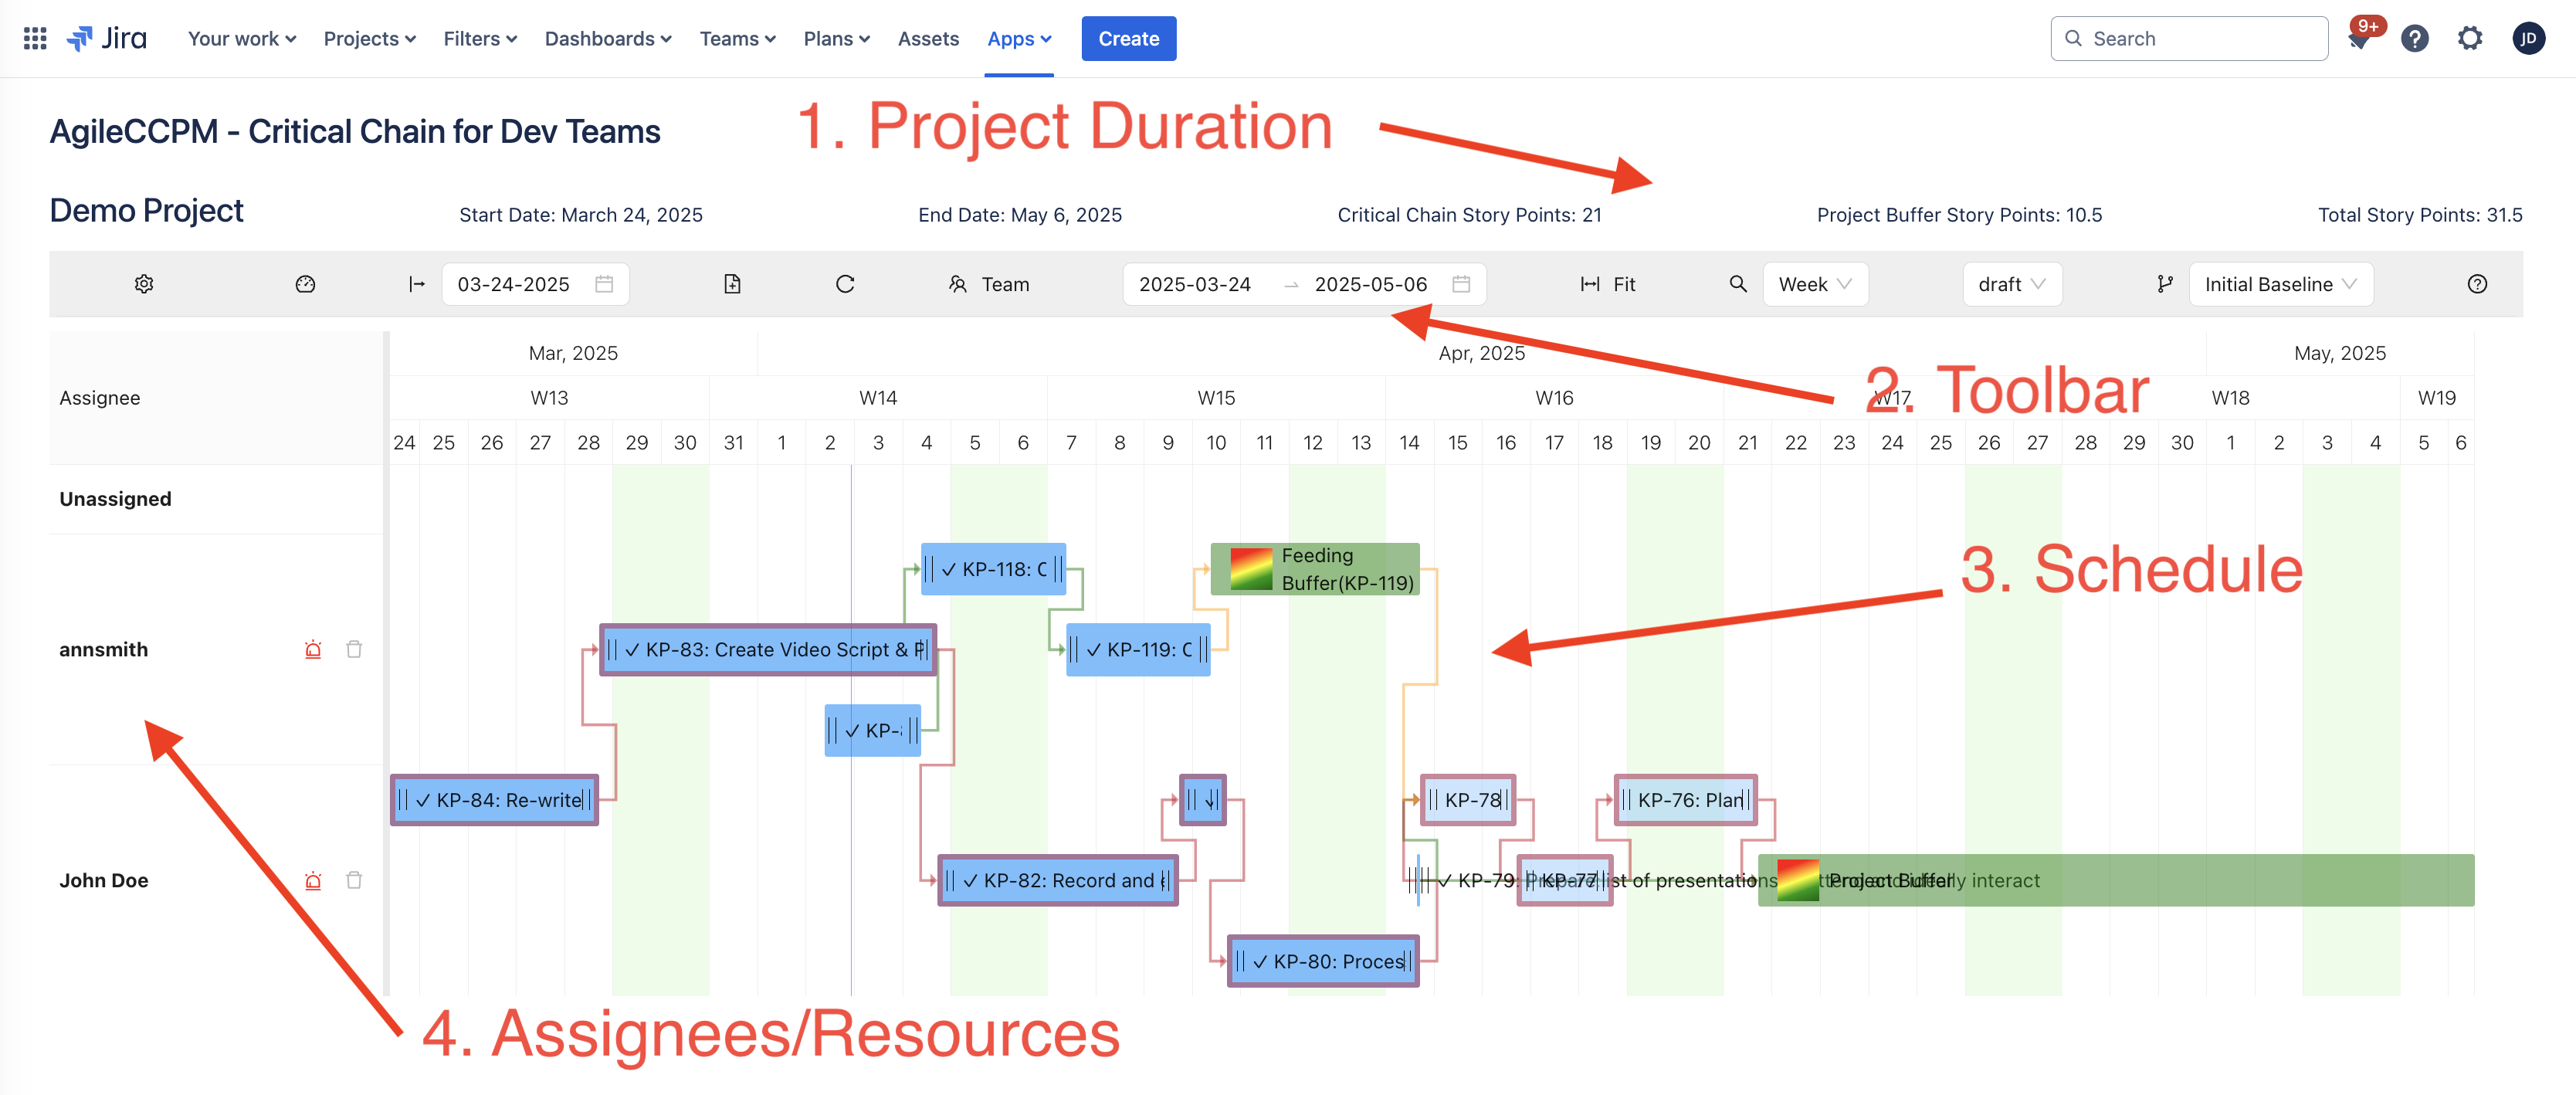
Note: With agileCCPM for Jira, both Feeding Buffers and Project Buffers are automatically calculated and added. Here’s how your Agile Critical Chain project schedule will look in Jira:
6. Monitor and Adjust During Execution
Track Buffer Consumption
Monitor buffer consumption to measure progress and detect risks early.
Focus on Critical Tasks
Ensure resources remain dedicated to Critical Chain activities to maintain the project schedule.
Automation with agileCCPM:
Our app automatically calculates progress and buffer penetration for your Critical Chain projects. Metrics are displayed for individual buffers, the project itself, and even across your full project portfolio.
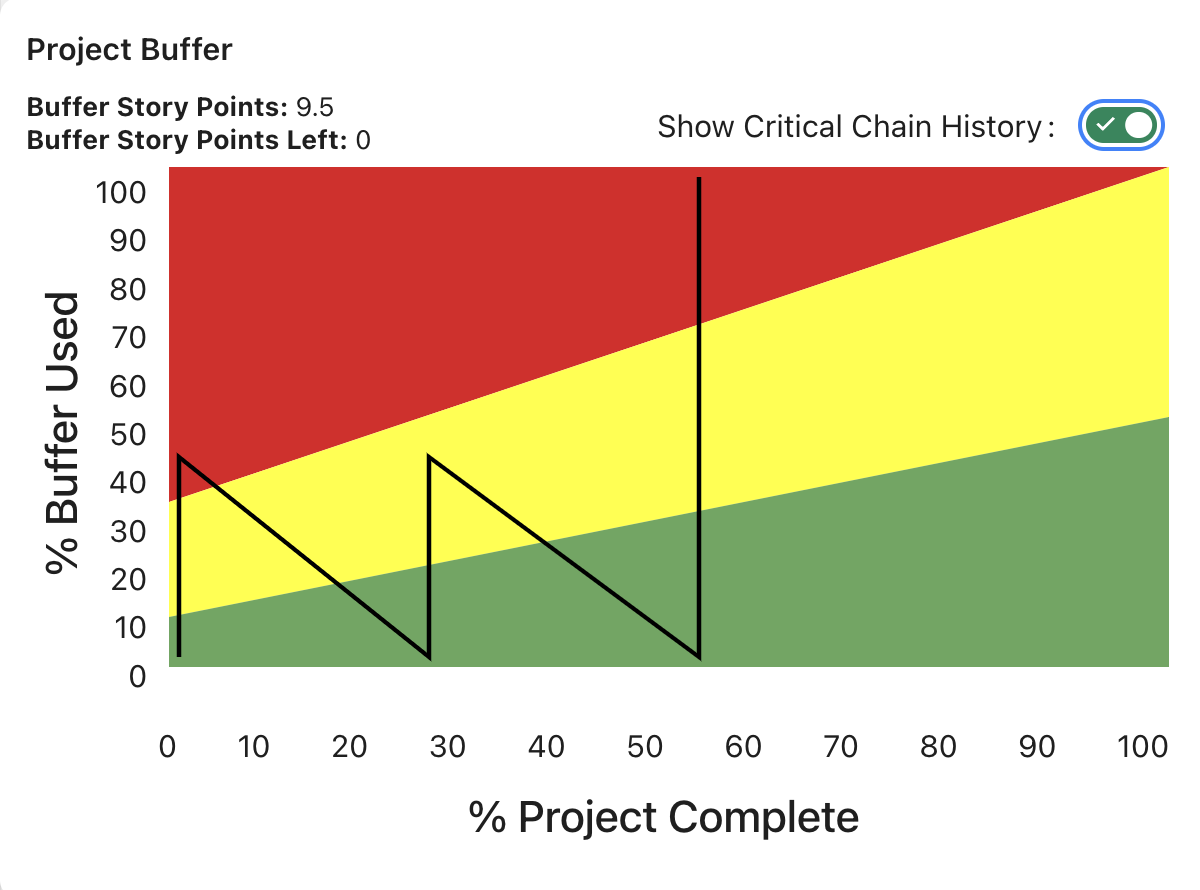
The chart categorizes buffer penetration into three zones based on project progress:
- Green (Watch): Progress is on track.
- Yellow (Plan): Prepare corrective actions.
- Red (Act): Immediate intervention required.
This visual tool enables proactive, data-driven decision-making to ensure project and portfolio success.
Summary
By following these steps, Critical Chain Scheduling ensures a robust and resource-efficient project plan, helping teams manage uncertainties and deliver projects on time.
For detailed instructions on using agileCCPM to manage your Critical Chain projects directly in Jira, start here.